GitOps is the practice of having the Git repository as the source of truth for your desired application infrastructure. With GitOps, you define infrastructure declaratively in the repository, and set up a continuous delivery tool to automatically track your production branch.
There are plenty of advantages to adopting GitOps. As deployments are automated, there is no manual process and you can deploy as often as you want – at each push to master, or at each tag. Error recovery is as simple as a Git revert. Application infrastructure is transparent and developers can easily see it in the Git history. There’s no need to SSH into servers to see running processes, as the current state is available in the production branch of the repository. Deploying multiple applications for various environments is also as easy as having multiple branches.
In this blog post, we will show you how you can use GitOps to:
- Deploy Edge Delta agents to a Kubernetes cluster at every push to master
- Manage Edge Delta agent configurations within the Git repository
To do so, we will install and use Argo CD, a GitOps Continuous Delivery tool for Kubernetes. It is implemented as a Kubernetes controller, which monitors Git repositories and continuously applies changes when a deviation from the desired state is observed.
Setting up Argo CD
The first step in setting up Argo CD is to define agent configuration as a configmap to follow Argo CD’s logs.
apiVersion: v1 kind: ConfigMap metadata: name: edgedelta-agent-config namespace: edgedelta data: config.yml: |- version: v2 agent_settings: tag: gitops_blog inputs: kubernetes: - labels: "kubernetes_logs" include: - "pod=argocd*" auto_detect_line_pattern: true processors: regexes: - name: "error_level" pattern: "ERROR|error|Error|Err|ERR" interval: 1m retention: 3h trigger_thresholds: anomaly_probability_percentage: 95 workflows: example_workflow: input_labels: - kubernetes_logs processors: - error_level
The Edge Delta agent can be instructed to use local configuration with the environment variable ED_SKIP_CONF_DOWNLOAD set. The agent will still connect to the Edge Delta backend and show the logs. The input is configured to watch pod outputs which start with argocd.
Note that we need to create ed-api-key and ed-org-id secrets.
kubectl create secret generic ed-api-key
    --namespace=edgedelta
    --from-literal=ed-api-key=””
kubectl create secret generic ed-org-id
--namespace=edgedelta
--from-literal=ed-org-id=””Edge Delta daemonset is defined as follows.
apiVersion: v1
kind: Namespace
metadata:
name: edgedelta
---
apiVersion: apps/v1
kind: DaemonSet
metadata:
name: edgedelta
namespace: edgedelta
annotations:
prometheus.io/scrape: "true"
labels:
k8s-app: edgedelta-logging
version: v1
kubernetes.io/cluster-service: "true"
spec:
selector:
matchLabels:
k8s-app: edgedelta-logging
updateStrategy:
type: RollingUpdate
rollingUpdate:
maxUnavailable: 1
template:
metadata:
labels:
k8s-app: edgedelta-logging
version: v1
kubernetes.io/cluster-service: "true"
spec:
serviceAccountName: edgedelta
containers:
- name: edgedelta-agent
image: gcr.io/edgedelta/agent:latest
env:
- name: ED_API_KEY
valueFrom:
secretKeyRef:
key: ed-api-key
name: ed-api-key
- name: ED_ORG_ID
valueFrom:
secretKeyRef:
key: ed-org-id
name: ed-org-id
- name: ED_SKIP_CONF_DOWNLOAD
value: "1"
- name: ED_HOST_OVERRIDE
valueFrom:
fieldRef:
fieldPath: spec.nodeName
command:
- /edgedelta/edgedelta
- -c
- /config/config.yml
resources:
limits:
memory: 512Mi
requests:
cpu: 200m
memory: 256Mi
volumeMounts:
- name: edconfig
mountPath: /config
- name: varlog
mountPath: /var/log
- name: varlibdockercontainers
mountPath: /var/lib/docker/containers
readOnly: true
terminationGracePeriodSeconds: 10
volumes:
- name: varlog
hostPath:
path: /var/log
- name: varlibdockercontainers
hostPath:
path: /var/lib/docker/containers
- name: edconfig
configMap:
name: edgedelta-agent-config
---
apiVersion: rbac.authorization.k8s.io/v1
kind: ClusterRoleBinding
metadata:
name: edgedelta
subjects:
- kind: ServiceAccount
name: edgedelta
namespace: edgedelta
roleRef:
kind: ClusterRole
name: edgedelta
apiGroup: rbac.authorization.k8s.io
---
apiVersion: rbac.authorization.k8s.io/v1
kind: ClusterRole
metadata:
name: edgedelta
labels:
k8s-app: edgedelta-logging
rules:
- apiGroups: [""] # "" indicates the core API group
resources:
- namespaces
- pods
verbs:
- get
- watch
- list
---
apiVersion: v1
kind: ServiceAccount
metadata:
name: edgedelta
namespace: edgedelta
labels:
k8s-app: edgedelta-logging
For this blog post, we will use Argo CD, and manage Edge Delta Agent configurations defined as configmaps.
First, we create an Amazon EKS cluster, and install kubectl. Then, we will configure kubectl to target our cluster.
aws eks update-kubeconfig --region --name
After that, we can simply create a namespace for Argo CD and apply Argo CD’s manifest.
kubectl create namespace argocd kubectl apply -n argocd -f https://raw.githubusercontent.com/argoproj/argo-cd/stable/manifests/install.yaml
To use the Argo CD web interface, take the following action.
kubectl patch svc argocd-server -n argocd -p '{"spec": {"type": "LoadBalancer"}}'
Now, we get the argocd-server address.
export ARGOCD_SERVER=`kubectl get svc argocd-server -n argocd -o json | jq --raw-output '.status.loadBalancer.ingress[0].hostname'`
Then, we can log in with our admin user. The initial password is available with the following command. (Don’t forget to change it later!)
kubectl -n argocd get secret argocd-initial-admin-secret -o jsonpath="{.data.password}" | base64 -d; echo
Once you login, follow the steps in the Argo CD guide to configure your application. You can connect via an SSH credential, HTTPS user and password, or an access token.
For this blog post, we will create an access token in GitHub. Once we configure the tracking branch and the path to the Kubernetes manifests, we are good to go. By default Argo CD pulls the repository every three minutes, and synchronizes if there is any change detected. If we want Push based syncing, we can also configure a web hook in GitHub.
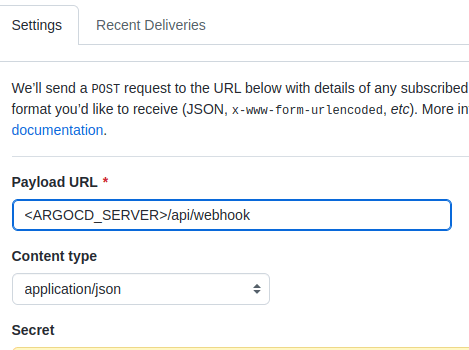
After configuring the web hook, Argo CD will sync every time we push to master.
But how do we make sure that our agent configuration is valid? We can add a CI step to validate our configuration using the Edge Delta API. Then, we can authenticate with an API token.
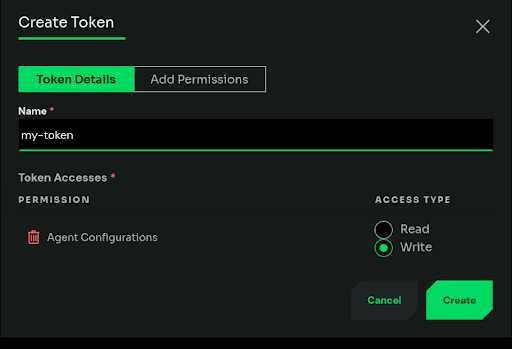
To create an API token, in the Edge Delta application, we go to ‘My Organization’, select ‘API Tokens’ tab, and click on ‘Create Token’.
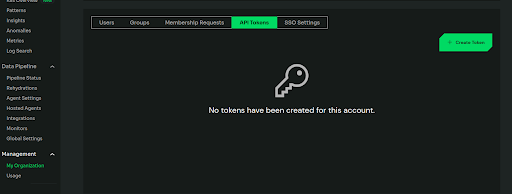
We can then add permissions to access agent configurations.
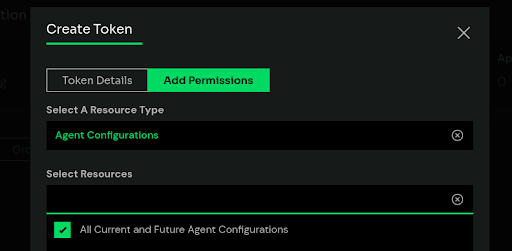
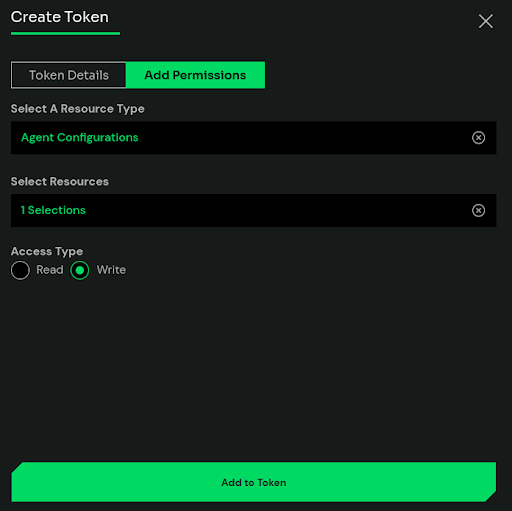
Once we create the token, we can include it in the X-ED-API-Token header. To do so, first we store the configuration in $config variable, and build the payload.
payload=$(jq -Rs '{ "tag":"gitops_blog", "content": . }' <<< "$config")
Then, we can send the request.
curl -X POST -H “Content-Type: application/json” -H “X-ED-API-Token: $token” -d “$payload” https://api.edgedelta.com/v1/orgs/$org_id/confs/validateIf the configuration is valid, we will get 200 response with a body {"valid":true}.
Otherwise we will get
{
  "reason": "string",
  "valid": false
}
If required, the configuration can also be uploaded to EdgeDelta backend with an Argo CD post sync hook.
apiVersion: batch/v1 kind: Job metadata: name: after namespace: edgedelta annotations: argocd.argoproj.io/hook: PostSync argocd.argoproj.io/hook-delete-policy: HookSucceeded spec: template: spec: containers: - name: create-config image: curlimages/curl command: - "curl" - "-X" - "POST" - "-H" - "X-ED-API-Token: " - "--data" - '{"tag":"gitops_blog","content":" version: v2n # config changen agent_settings:n tag: gitops_blogn log:n level: debugnn inputs:n kubernetes:n - labels: "kubernetes_logs""n include:n - ""pod=argocd*""n auto_detect_line_pattern: truenn n processors:n regexes:n - name: ""error_level"" n pattern: ""ERROR|error|Error|Err|ERR""n interval: 1mn retention: 3hn trigger_thresholds:n anomaly_probability_percentage: 95nn workflows:n example_workflow:n input_labels:n - kubernetes_logsn processors:n - error_leveln""}' - ""https://api.edgedelta.com/v1/orgs//confs"" restartPolicy: Never backoffLimit: 2