Edge Delta provides a best-in-class pipeline management experience for our customers, helping them get the most out of their telemetry data for efficient and scalable monitoring and analysis.
With our intuitive, point-and-click pipeline interface — paired with our new Live Capture feature — Edge Delta users can easily configure new data flows and comprehensively visualize how processors impact real data as it’s flowing through their Telemetry Pipelines.
Once major pipeline components are configured, however, some Edge Delta customers choose to automate additional configurations to maximize efficiency. A majority of them leverage Hashicorp Terraform, a popular Infrastructure-as-Code (IaC) tool, to accomplish this.
In this article, you’ll learn how to leverage Terraform — together with the Edge Delta API — to automate pipeline configuration changes in Edge Delta, including:
- Creating a pipeline
- Modifying a pipeline
- Importing the configuration of an existing pipeline
It’s important to note, too, that this is by no means the limit of what can be done with the Edge Delta API. This post is just a quick introduction to get you familiar with automating Edge Delta Pipelines using Terraform.
Meeting the Requirements
There are a few requirements that must be fulfilled before beginning pipeline automation. The full list is outlined in the README of this GitHub Repository: https://github.com/edgedelta/terraform-provider-edgedelta
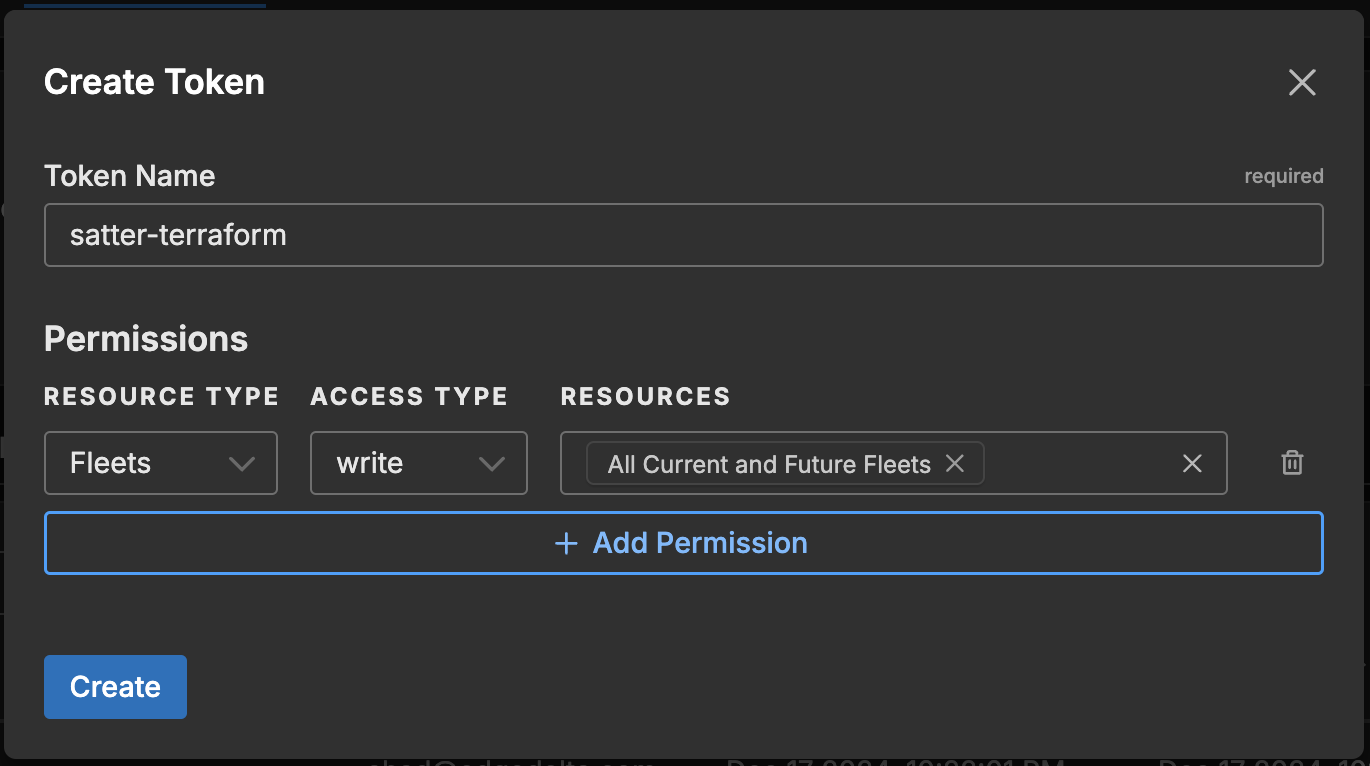
In short, Terraform >= 0.13.0 and the Terraform-provider-edgedelta plugin >= 0.0.1 is recommended. You will also need an API token from your Edge Delta account. To create one, log in at app.edgedelta.com, navigate to Admin -> My Organization -> API Tokens, and click on the “+ Create Token” button.

To start, give the token similar permissions to what is shown below:
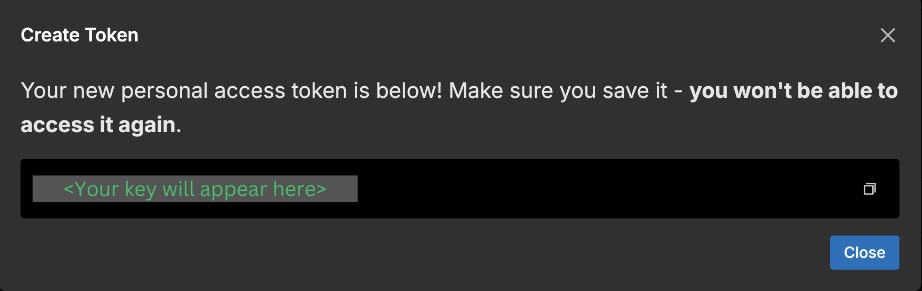
After clicking the “Create” button, your newly generated personal access token key will pop up on the screen. Be sure to save the key, as it will no longer be accessible once you close the window.
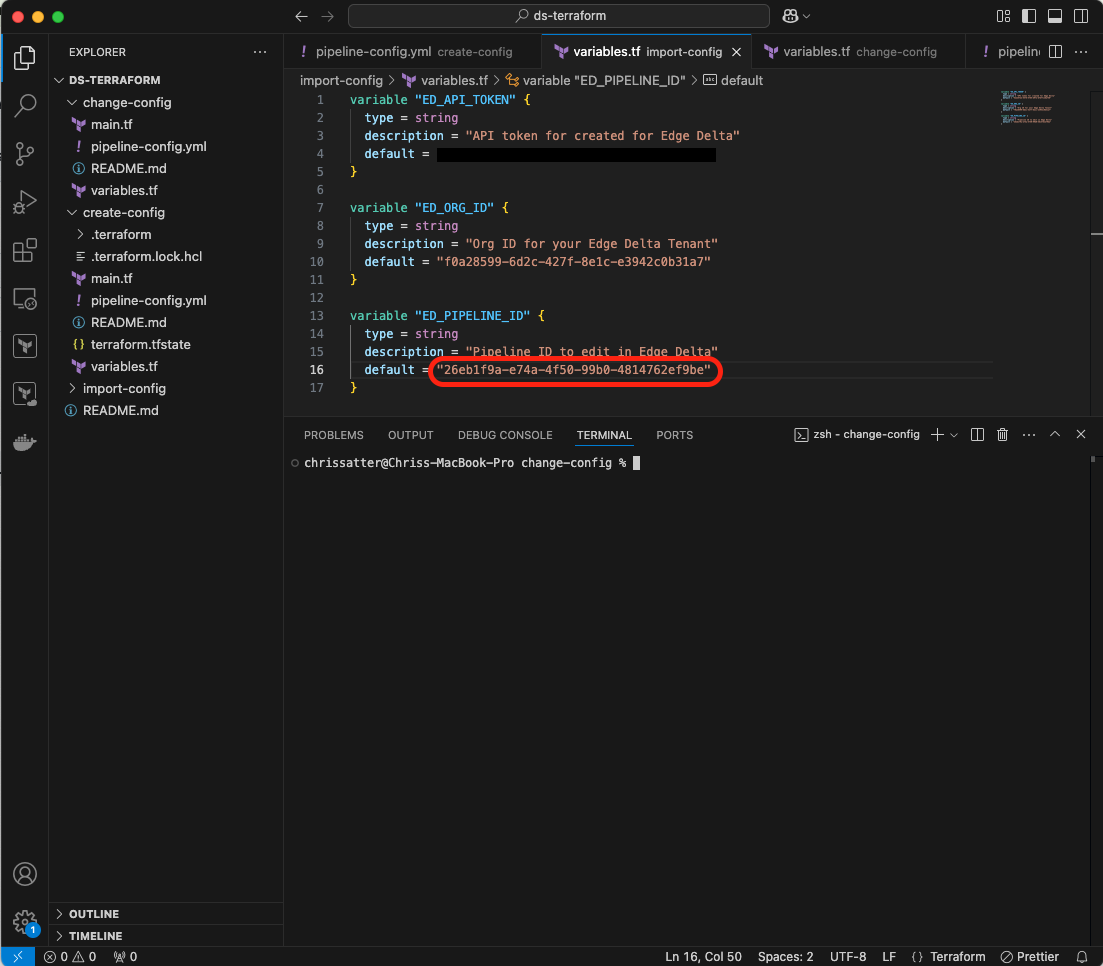
Once the window is closed, you will be brought back to the Admin Page, from where you can grab your Organization ID. This, as well as your API token, will be needed in the {variables.tf} file later on.

Time to Automate
Pipeline Creation
Open the downloaded and extracted ds-terraform example in the code editor of your choice and navigate to the create-config directory. Modify the variables.tf with your API token and Organization ID saved from the Requirements section above, placing them into the appropriate `default = ` areas.
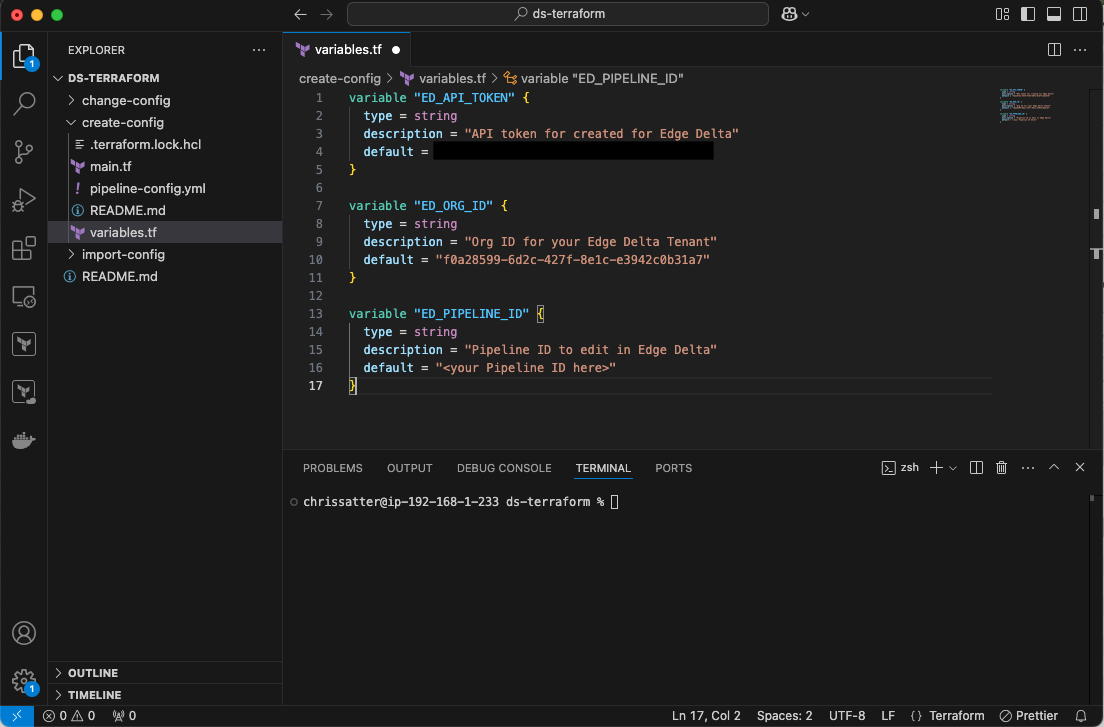
Ignore the “ED_PIPELINE_ID” for now; we’ll modify it with the ID of the new pipeline once it’s created.
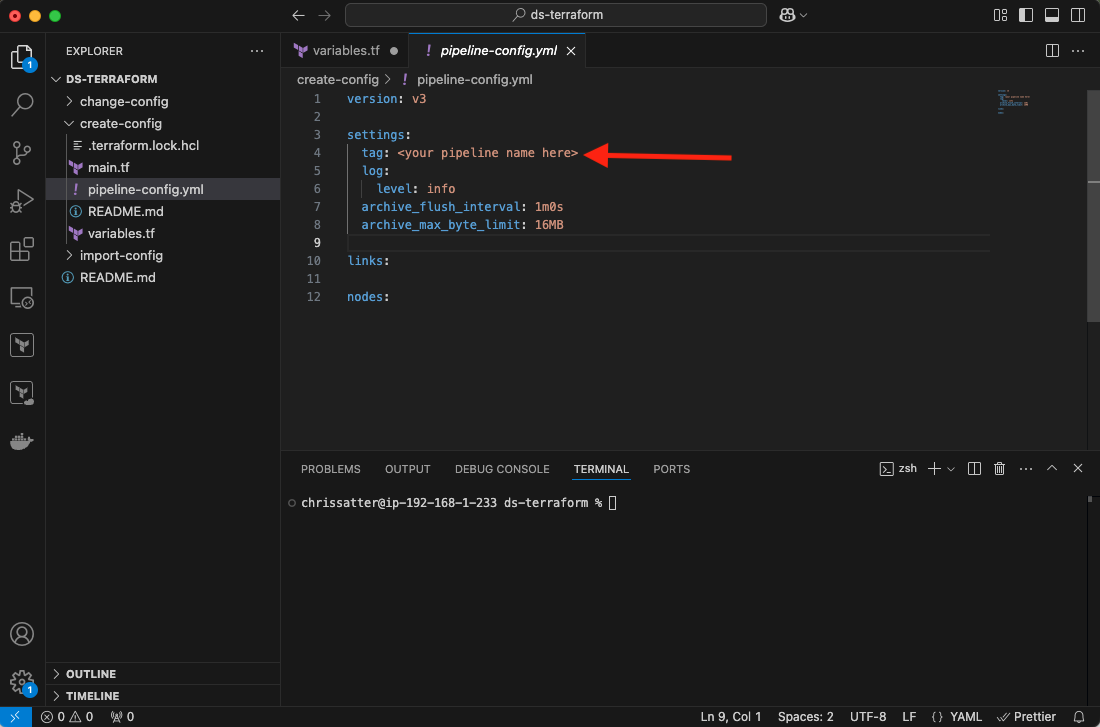
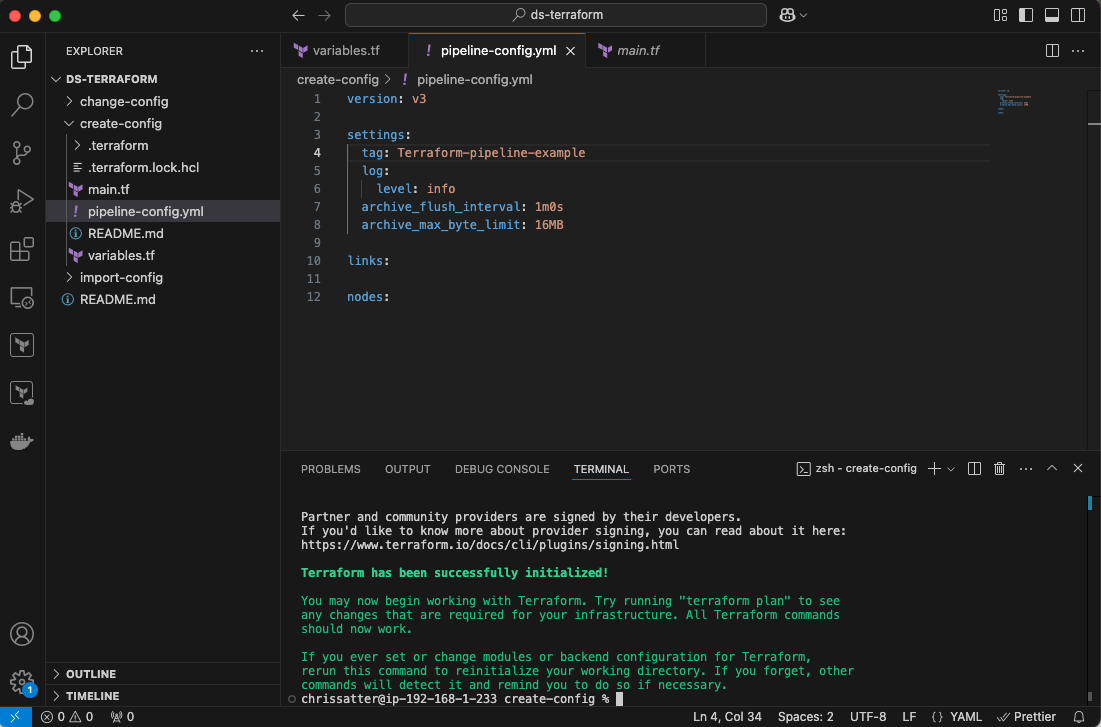
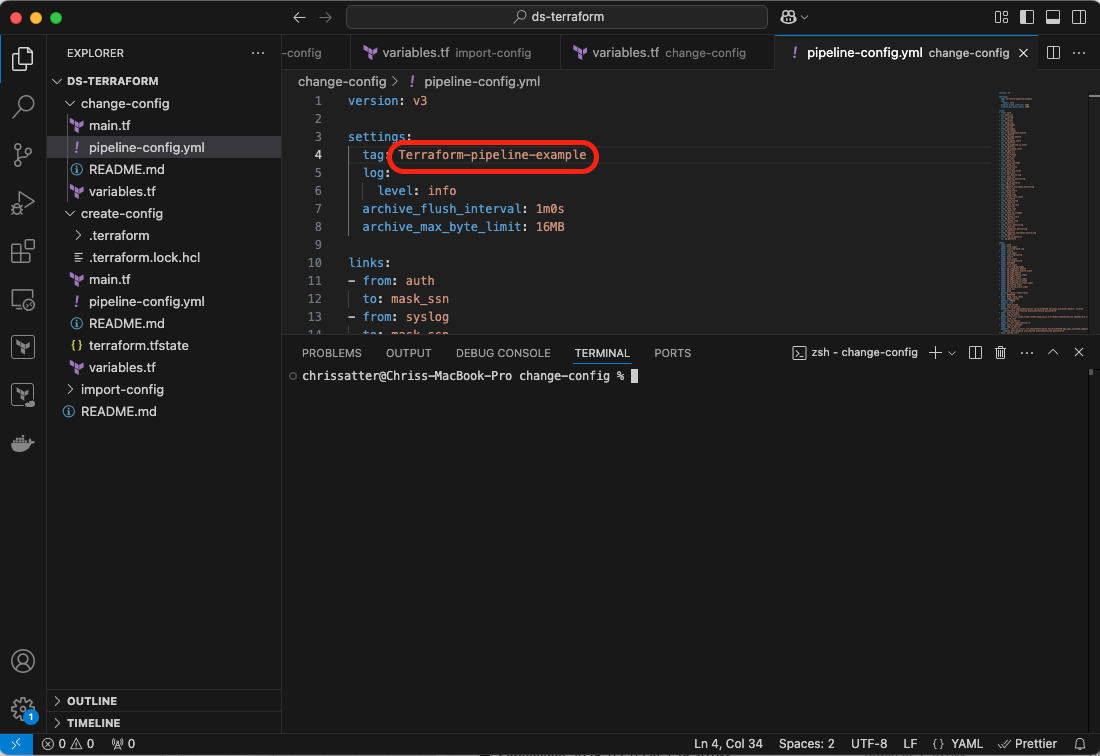
Next, go to the pipeline-config.yml and change the name of the first tag under settings to what you want your pipeline to be named.
Then, from the terminal or command prompt, type:
terraform initYou should see something similar to the output below.
If you do not see something similar, you will need to troubleshoot your Terraform installation. Otherwise, you’re ready to move on.
After running the following command:
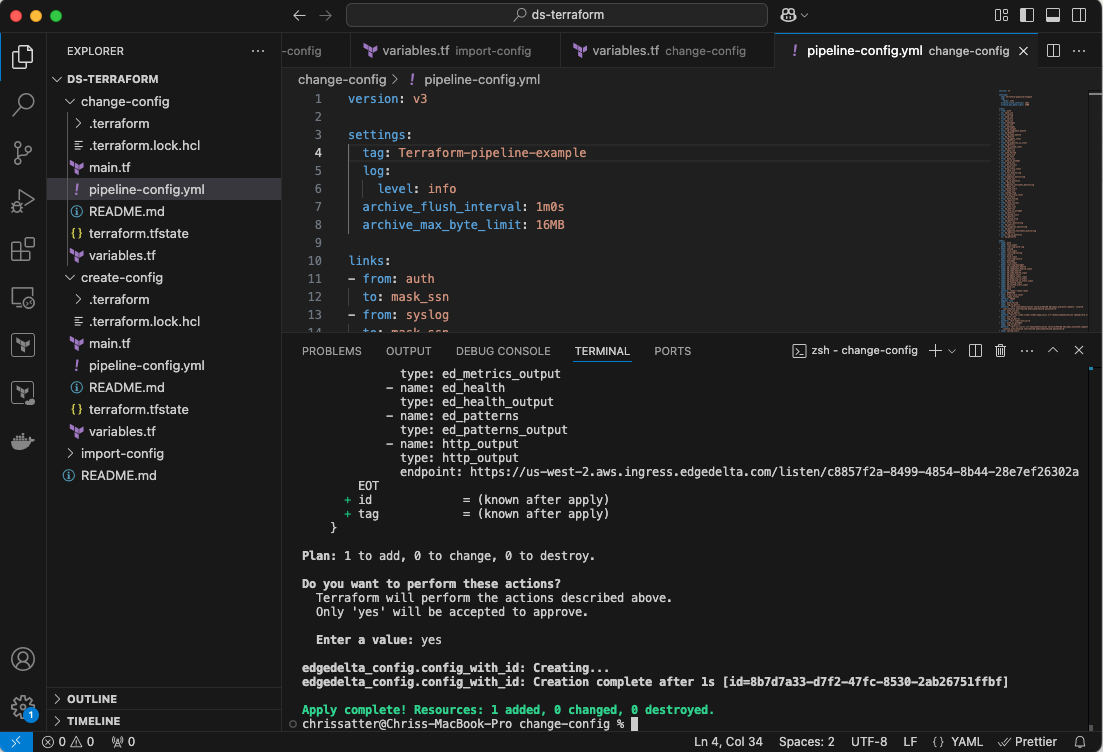
terraform applyYou have created the new pipeline configuration, and should now see something similar to the below:
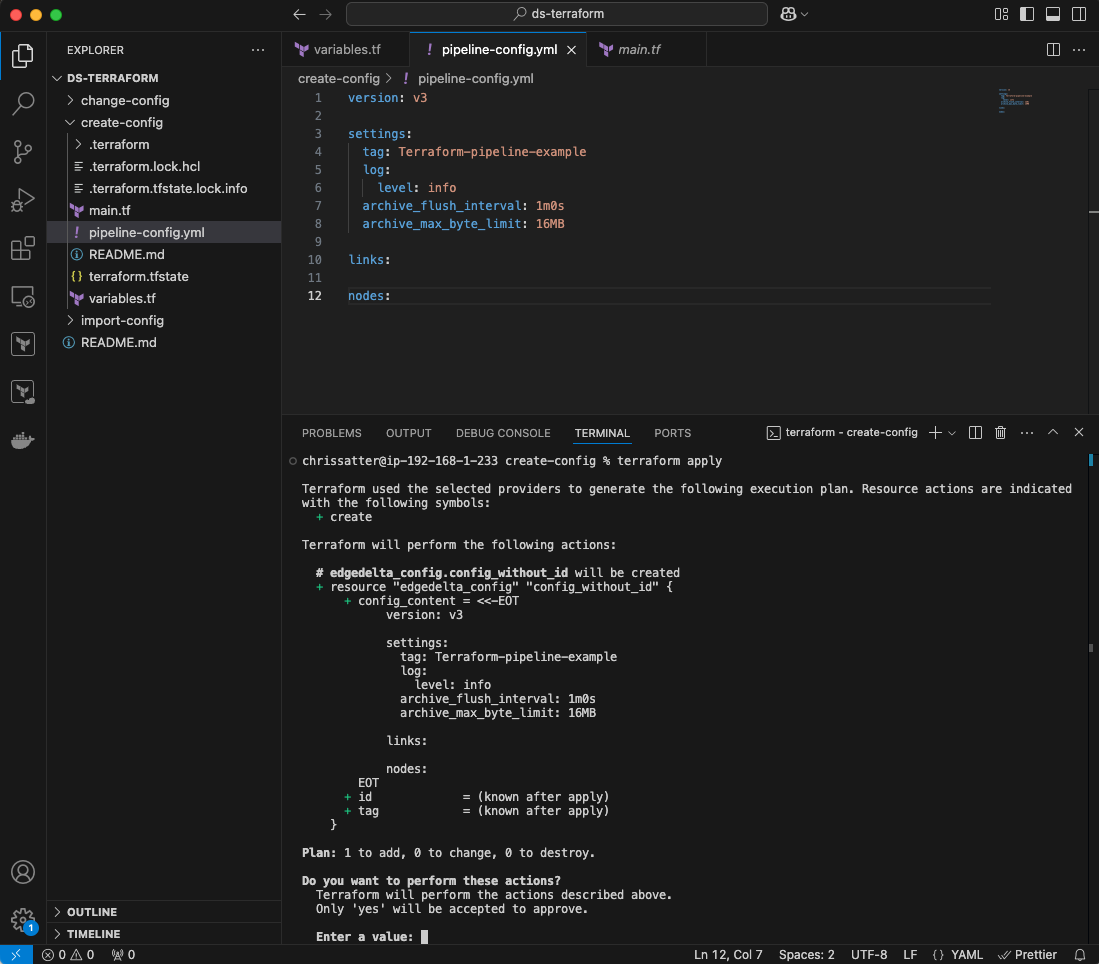
Type “yes” and you will see this output:
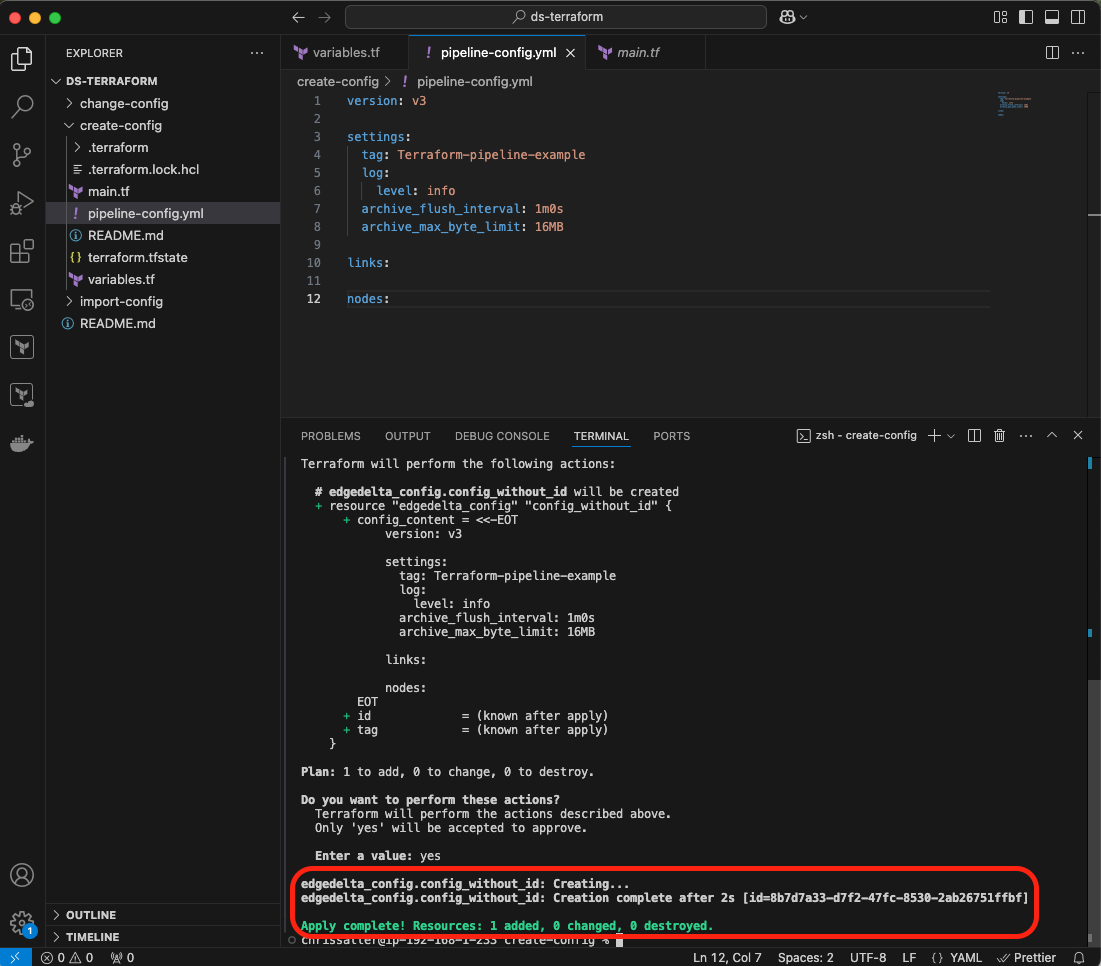
The ID is the Pipeline ID that was just created. You should now be able to go back to the web browser where you obtained your API Key and Organization ID from Edge Delta, click on Pipelines, and see your new pipeline:
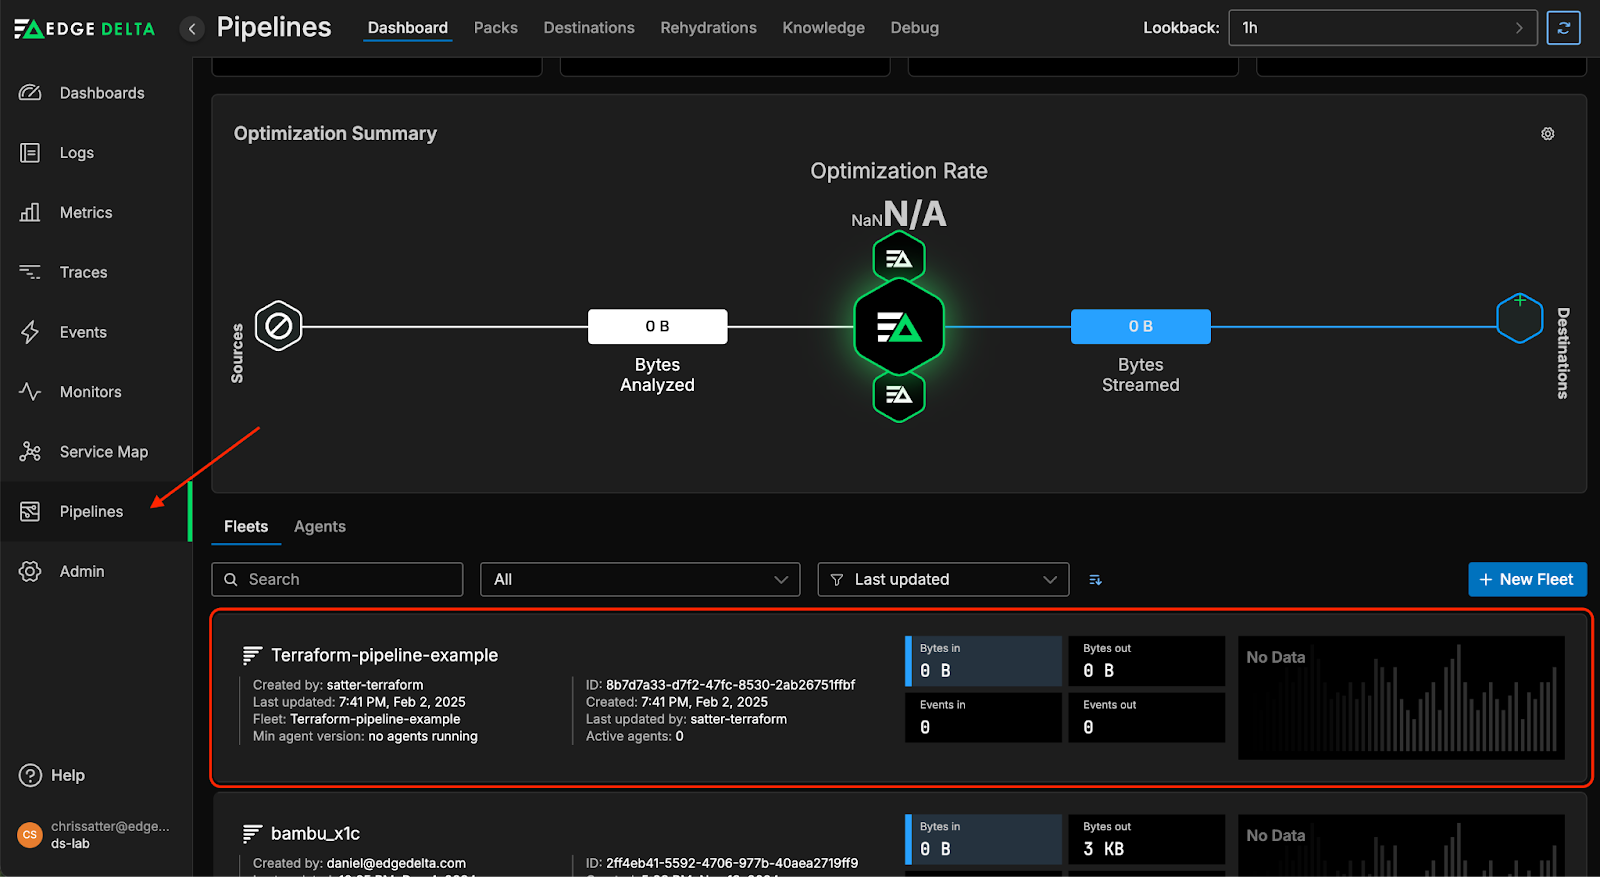
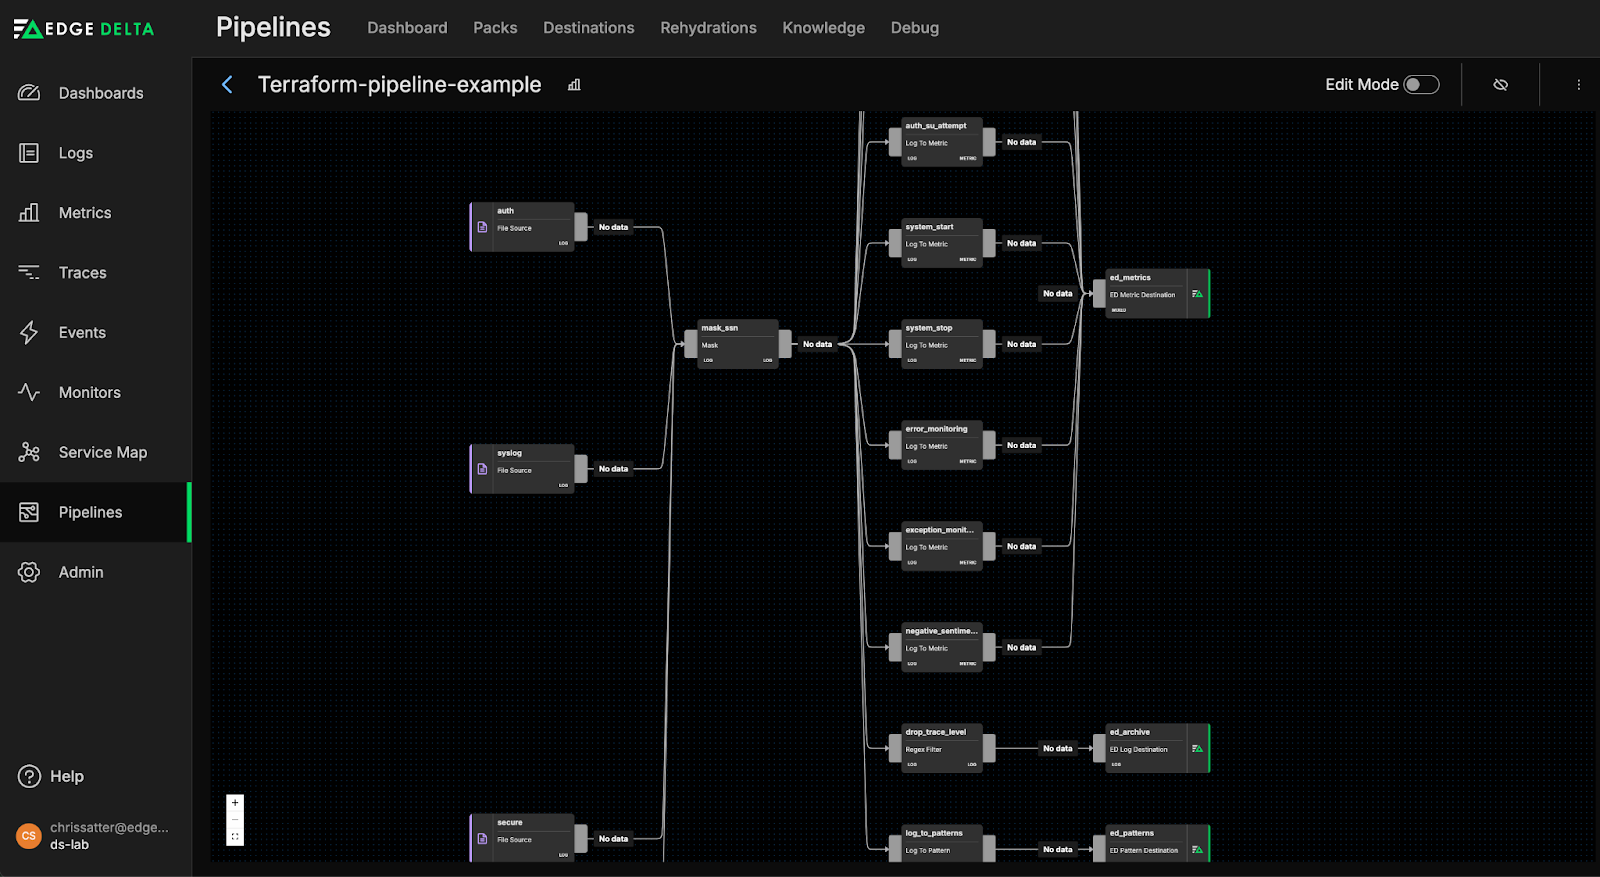
This is a great start, but if you drill into the pipeline, you will see that it is not that interesting yet.
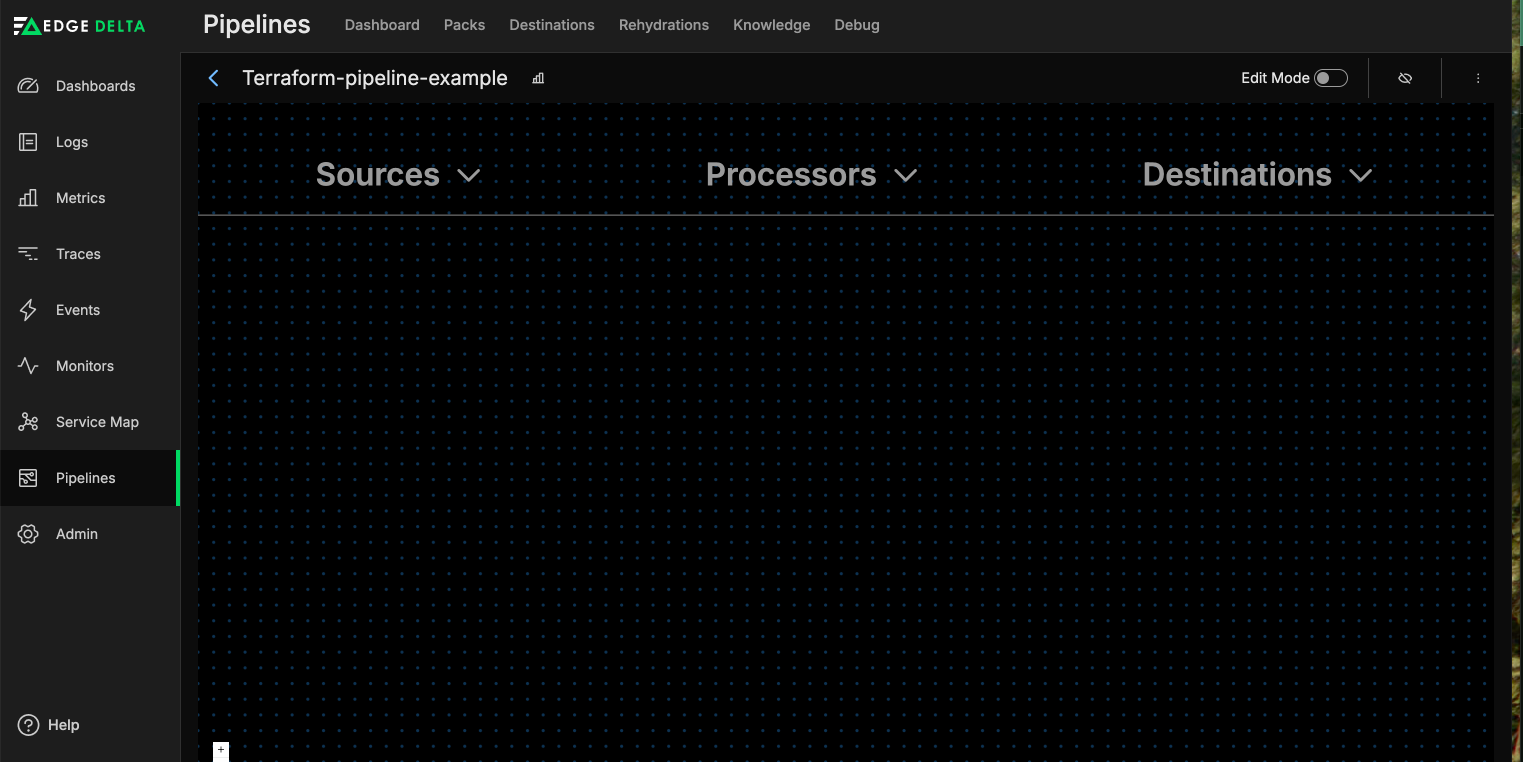
You could add Sources, Processors, and Destinations manually, but if you’d prefer to automate, keep following the steps in this post.
Pipeline Change
In your terminal, move over to the change-config directory, and while in it, view the variables.tf file. Add the API token and Organization ID as you did in the above step, as well as the Pipeline ID of the newly-created pipeline:
There is already a pipeline-config.yml in the change-config repo; just make sure to update the tag to match what you named your pipeline:
Applying these changes is just as easy as before:
terraform initterraform applyAgain, you should see a similar output to this:
But now, when you look at your pipeline, you’ll see a lot more happening, as multiple new file sources, processor nodes, and downstream destinations have been automatically added.
Congratulations! You’ve successfully created a new Edge Delta Pipeline entirely through Terraform. If you want more practice, there is another example in the repo you can try that can import a configuration from another pipeline already in your Edge Delta Fleet listing.
Once you feel confident working with Terraform and the Edge Delta API, you can begin to automate your pipeline configurations even further. For example, you might add conditional logic to automatically insert a log-to-metric node into your pipeline when log volume surpasses a certain threshold, to prevent downstream ingest spikes and maintain system efficiency.
Get started with Terraform and the Edge Delta API
Terraform is a powerful tool that automates and accelerates your workflows with Edge Delta. Whether you’re creating dynamic pipelines for rapid, ad-hoc development or leveraging decision trees to intelligently route data to different destinations within your troubleshooting or threat investigation processes, the steps we covered in this post offer a streamlined, scalable solution. With automation in place, you can eliminate manual intervention, improve consistency, and quickly adapt to evolving needs.
Once you’ve familiarized yourself with the basics of Edge Delta Pipeline configuration with Terraform, there are a number of more advanced tasks you can automate, including dynamic lookup table modifications, rehydrations, adding new integrations, and much more.