Managing Kubernetes with raw YAML files may work for simple applications. But as environments scale, the overhead quickly becomes unmanageable.
Teams often face challenges such as repeated configurations, inconsistent environments, and limited rollback options. In fact, one survey found that 77% of users believe Kubernetes complexity slows down their work.
Helm addresses these challenges by acting as a package manager for Kubernetes. With Helm, you can bundle applications into reusable charts that include templates, default values, and version control. Instead of manually applying multiple YAML files, teams can install, upgrade, or roll back entire applications with a single command.
This tutorial provides a practical introduction to Helm — what it is, why it’s valuable, and how to use it in real projects, whether you’re managing microservices, shared infrastructure, or multi-environment deployments.
Key Takeaways
• Helm reduces deployment failures by managing dependencies and ensuring required components are present.
• Centralized values files make it easy to override configurations while keeping environment-specific deployments consistent.
• A large ecosystem of charts is available — over 2,000 in Helm’s official chart archive.
• Advanced features such as hooks and subcharts enable fine-grained lifecycle control and modular application design.
• Without Helm, teams spend excessive time on configuration instead of focusing on application development.
• Roughly 9 out of 10 organizations expect to integrate Helm into their workflow within a year of using Kubernetes.
• Helm’s CLI-first design works seamlessly with GitOps workflows, CI/CD pipelines, and modern DevOps practices.
What is Helm?
Helm is a Kubernetes package manager that simplifies application deployment by packaging Kubernetes resources into reusable charts. It’s similar in concept to npm for Node.js or pip for Python.
Instead of managing long YAML files by hand, you use Helm to install, upgrade, and roll back applications with a single command.
Helm has become a standard tool in Kubernetes workflows. About 90% of teams adopt it within a year of using Kubernetes. Its templating system and built-in version control make it easier to manage complex applications across different environments.
The following sections explain Helm’s key concepts, its internal architecture, and its role in the Kubernetes workflow.
Core Helm Concepts and Terminology
Helm utilizes a single command-line interface (CLI) tool that enables the quick creation, management, and configuration of Kubernetes applications. It organizes applications with multiple Kubernetes resources with the following Helm building blocks:
- Chart: A Helm chart is a package that contains all the Kubernetes manifests needed to deploy an application. It includes templates, configuration values, and metadata. Think of it as a bundle of YAML files organized for reuse.
- Release: When you install a chart, Helm creates a release — a specific, named instance of the chart running in your cluster. You can install the same chart multiple times with different names or configurations.
- Repositories: Helm charts are stored in repositories, much like code packages in npm. Public repositories, such as Artifact Hub, host thousands of community charts. You can also set up private repos for internal use.
- Values: The
values.yamlfile lets you configure a chart without changing the templates. You can override default values for things like container images, replica counts, and environment variables, making your chart reusable across dev, staging, and production.
Helm Architecture and Components
Helm 3 uses a simple, client-only architecture that interacts directly with the Kubernetes API — no server-side component like Tiller (used in earlier versions) is required. This change improves both security and operational simplicity.
There are two key parts:
- Helm CLI: The command-line interface (helm) used to install, upgrade, and manage charts. It also handles templating and repository management.
- Helm Library: A Go-based engine that renders templates, tracks release states, and handles chart logic under the hood.
This design keeps everything centralized in the Helm CLI and supports portable, secure operations across any Kubernetes cluster.
How Helm Fits in the Kubernetes Ecosystem
The Helm package manager sits on top of Kubernetes as a higher-level tool that simplifies how teams install, configure, and manage applications. Instead of applying raw YAML files with kubectl, you use Helm charts to deploy consistent configurations across environments.
Helm integrates well with GitOps and CI/CD workflows. You can version your configurations, automate rollouts, and track releases with simple commands, all of which reduce manual errors and speed up deployments.
For teams managing microservices or multiple clusters, Helm charts provide a reusable structure for shared templates and environment-specific values. The Helm package manager complements Kubernetes’ power by adding consistency and repeatability that Kubernetes alone doesn’t offer.
The Problems Helm Solves
Managing Kubernetes applications at scale with raw YAML quickly becomes error-prone and time-consuming. What starts as a handful of configuration files can balloon into hundreds, each with subtle differences that are difficult to track and maintain. Teams often struggle to keep environments consistent, roll back failed changes, or manage complex interdependencies between services.
As environments grow more complex, these challenges lead to common issues like config drift, lack of versioning, dependency conflicts, and environment inconsistencies. Helm addresses each of these in a practical, structured way.
YAML Management and Configuration Drift
As applications grow, maintaining separate YAML files for dev, staging, and production leads to inconsistencies and duplicated effort.
Small manual edits can create differences between environments that are hard to spot. These often show up only through unexpected behavior in logs or events. Even minor configuration drift can be tough to trace, especially in Kubernetes environments.
According to a report, 44% of developers have experienced the inconvenience of configuration drift as their projects scale and run across more clusters.
Helm solves this problem by introducing templates and centralized values files. You define your configuration once and override only what differs between environments, cutting down duplication and improving consistency.
| Problem | Without Helm | With Helm |
|---|---|---|
| Configuration drift | Diverging files across environments | Centralized templates that can easily be overridden |
| Manual updates | Repetitive edits across multiple files and services | One update to the values file applies across the app |
| Environment fragmentation | Separate YAML sets for dev, staging, and production | Shared chart with per-environment values |
| Audit and rollback gaps | No version tracking; changes are made directly | Release tracking and rollback are supported |
Versioning and Rollback Challenges
Kubernetes doesn’t track changes between deployments, so reverting to a previous state often means manually hunting down and restoring old YAML files. It is a slow and error-prone process.
This becomes even riskier when deployment frequency increases. In fact, 29% of organizations deploy images or manifests to production multiple times within 24 hours, making a quick and reliable rollback essential.
Helm addresses this challenge through structured release management. You can view full history tracking and rollbacks with a single command, with no manual patching required.
The table below shows the versioning and rollback comparison of the manual and Helm processes:
| Scenario | Manual Process | Helm Process |
|---|---|---|
| Unstable version deployed | Manually identify and revert the YAML changes; requires time and coordination | Use the helm rollback command to a known working state instantly |
| Accidental change removal | No history tracking; root cause analysis is manual | Review all changes and identify regressions using: helm history command |
| Multi-team coordination | Multiple people may need to debug and redeploy | Rollback and reapply from one terminal with consistent results |
Dependency Management Issues
Kubernetes applications often rely on other components like databases, caches, or message queues. As dependencies grow, it becomes harder to manage install order, version compatibility, and configuration across services.
48% of development teams report running into dependency management issues during their Kubernetes deployments, a common pain point as systems scale.
With Helm, you can define dependencies directly in your chart. It then handles downloading, configuring, and installing them automatically during deployment or upgrade.
The table below shows how Helm simplifies dependency management:
| Challenge | Manual Approach | Helm Solution |
|---|---|---|
| Installation order | Must have manual coordination | Dependencies are resolved automatically during installation |
| Configuration reuse | Separate YAML files must be maintained per service | Values files can parameterize multiple dependencies |
| Updating components | Update each service separately and manually | Coordinated versioning across services with one command |
Environment Consistency Problems
Using separate YAML files for different environments often causes them to drift over time. Teams may introduce differences in values, naming conventions, or deployment methods, and these small inconsistencies add up. The more environments you manage, the greater the risk that something breaks where it matters most.
Research shows that 41% of developers encounter deployment discrepancies across environments, often discovering them only in staging or production.
Helm reduces this risk by using a single chart with environment-specific values files. This approach keeps deployment logic consistent while still allowing flexibility in configuration.
Here is a sample environment consistency comparison:
| Environment Issue | Manual Process | Helm Solution |
|---|---|---|
| Resource allocation differences | Duplicate YAML files for each environment | Centralized templates with parameterized values |
| Environment-specific settings | High duplication and error-prone edits across files | Environment-specific values files |
| Deployment process variation | Teams adopt their scripts or workflows | Consistent Helm workflows across dev, staging, and prod |
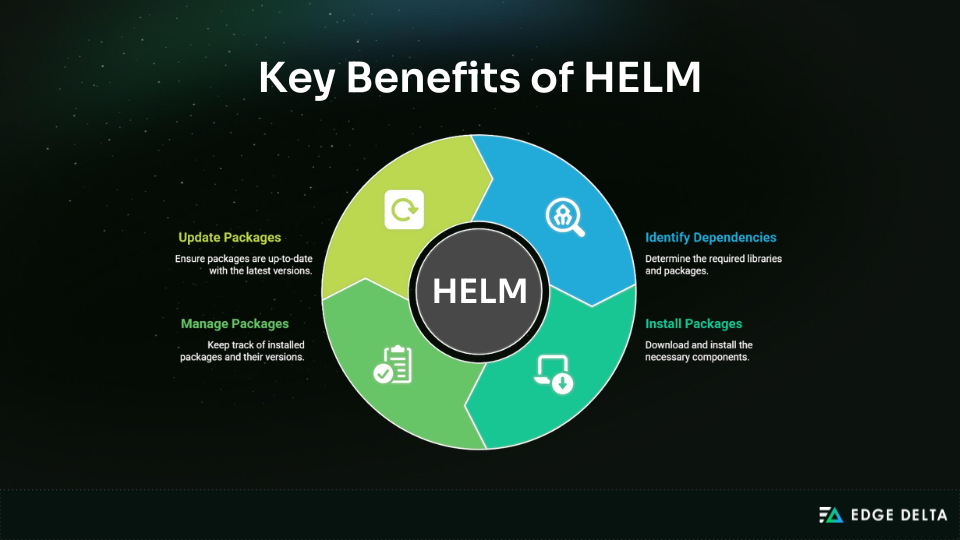
Key Benefits of Using Helm
Helm improves how Kubernetes applications are deployed, configured, and managed by introducing automation, consistency, and structure. Below are four core Helm benefits in development:
1. Templating and Reusability
Managing multiple environments with raw YAML often leads to duplication and error-prone edits. Helm’s templating system reduces this risk by letting you define reusable charts that generate environment-specific configs with minimal effort.
Here’s a quick overview of Helm’s templating benefits:
| Metric | Before Helm | After Helm |
|---|---|---|
| YAML maintenance | 100% manual | Automation >> Manual |
| Configuration drift | Common occurrence | Unlikely to occur |
| Template reuse | Copy-paste approach | Single source of truth (SSOT) |
2. Version Control and Release Management
Helm automatically versions every release. This makes it easy to view changes, audit deployments, and roll back when needed. There’s no need to dig through Git history or manual file diffs. Teams get safer deployments with minimal extra effort.
3. Dependency Management and Automation
Instead of coordinating service deployments manually or writing bash scripts, you define dependencies in the chart itself. Helm pulls, installs, keeps track of those subcharts, and ensures version compatibility between them.
4. Productivity and Operational Improvements
Helm simplifies the daily work of developers and operators. With one command, teams can install or update an app across environments without editing multiple files. It cuts down on config errors, reduces debugging time, and makes handoffs between teams much smoother.
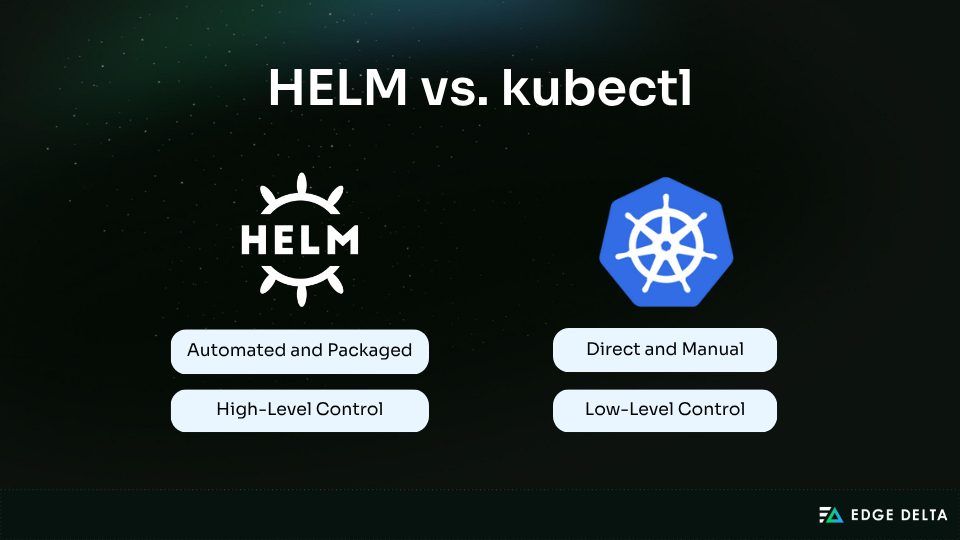
Helm vs kubectl**: A Detailed Comparison**
Helm and kubectl both manage Kubernetes applications, but they serve different roles. kubectl is a low-level CLI for directly interacting with Kubernetes resources. On the other hand, Helm manages applications as versioned, configurable packages.
Understanding when to use each tool is essential for an efficient dependency workflow.
Deployment Workflow Comparison
Helm handles the full lifecycle of an application release, which includes installation, upgrades, rollbacks, and templating. With kubectl, you’re applying raw YAML each time, often with manual edits for each environment.
Below are the differences in how each tool approaches deployment logic:
| Aspect | kubectl Workflow | Helm Workflow |
|---|---|---|
| Abstraction level | Low-level resource interaction | High-level release management |
| Packaging | Separate manifest files | Bundled chart directory |
| Templating | Static YAML | Go-based dynamic templates |
| Parameterization | Manual edits per environment | Values files or CLI overrides |
| Reusability | Copy/paste YAML | Reusable charts |
| Rollback | Manual reapply or edit | One-command rollback |
| Scaling complexity | Grows quickly | Simplified through structure |
Management and Maintenance Differences
One of the most significant differences between kubectl and Helm lies in long-term application management.
Helm is purpose-built for Kubernetes package management. It makes long-term app maintenance easier by tracking releases, managing versions, and resolving dependencies. Meanwhile, kubectl is better for quick fixes or inspecting the cluster directly.
Here’s a side-by-side comparison of management and maintenance differences:
| kubectl Challenges | Helm Advantages |
|---|---|
| No built-in versioning | Automatic release tracking |
| Manual history tracking | Built-in deployment history |
| Configuration drift over time | Centralized templates and values |
| Manual dependency coordination | Automated dependency management |
When to Use kubectl vs Helm
Use kubectl when you need low-level control, such as when you’re inspecting resources, debugging, or managing simple workloads. Use Helm when you’re working with complex applications, need reusability, or want consistent deployments across multiple environments.
Understanding these thresholds will help you determine which tool to use. See the table below:
| Use kubectl for: | Use Helm for: |
|---|---|
| Quick tests, low-level changes | Multi-service deployments |
| Inspecting cluster state | CI/CD pipelines and GitOps |
| Debugging and one-off commands | Reusable, environment-specific configurations |
| Learning and hands-on exploration | Release management and rollbacks |
Migration Strategies from kubectl to Helm
Many teams start out using kubectl with raw YAML because it’s fast and simple for small projects. However, as the app grows, managing multiple files, environments, and versions becomes harder. That’s when Helm starts to make sense.
Here’s a practical path for migrating existing Kubernetes manifests to a Helm chart:
- Organize your YAML files: Group resources by type into a clean folder structure.
- Create Helm charts: Run
helm create <chart-name>to scaffold a chart directory. - Move manifests into the chart: Copy your existing YAML files into the
templates/directory of the chart. - Templatize values: Replace hardcoded values with Helm template syntax. Define them in
values.yaml. - Add environment-specific values: Create separate values files like
values-dev.yaml,values-prod.yamlfor overrides. - Deploy the chart: Use
helm installwith the appropriate values file to deploy to your cluster.
Once migrated, you’ll gain release tracking, rollback capability, and better consistency across environments without rewriting your app.
Helm Chart Structure and Components
Helm charts are collections of files that describe sets of Kubernetes resources. Understanding their structure is key to customizing deployments and creating your own charts.
Here are the main components:
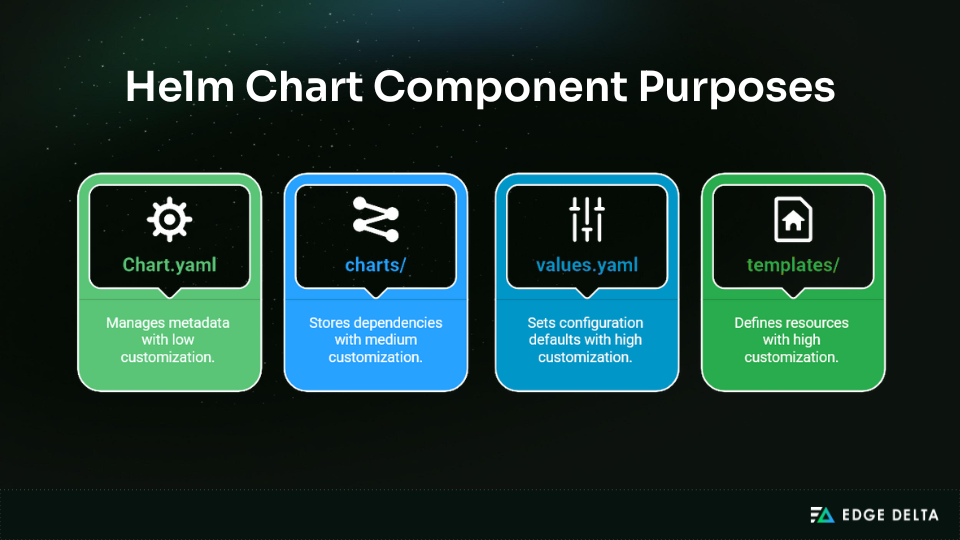
Chart.yaml– Contains metadata about the chart, including its name, version, description, and any dependencies.charts/– A place to include chart dependencies as subcharts, if your application depends on other services.Values.yaml– Stores default configuration values for your templates and can be overridden during deployment.templates/– Holds Kubernetes resource templates, which use Helm’s Go-based syntax to inject values from values.yaml.
A typical Helm chart directory looks like this (simplified):
my-app/
├── Chart.yaml
├── values.yaml
├── templates/
│ ├── deployment.yaml
│ ├── service.yaml
When you run helm install, Helm fills in the template values and deploys the resulting manifests to your cluster.
Creating and Customizing Charts
Helm provides a CLI command to generate a complete chart directory with starter templates and values. This chart creation follows established patterns that enhance development speed while ensuring maintainability and reusability.
Using the helm chart command, you can modify the generated chart skeleton to suit the desired application structure and configuration.
Getting Started with Helm
Installing Helm is quick and works across macOS, Linux, and Windows. You can get started by following the instructions on the official Helm installation page, or install it with a package manager like Homebrew:
brew install helmOnce installed, you can try Helm right away by installing a chart from a public repository:
helm repo add bitnami https://charts.bitnami.com/bitnami
helm install my-nginx bitnami/nginx
This command pulls the chart, applies the default settings, and deploys a running app to your Kubernetes cluster. From there, you can explore how the chart is structured or start customizing your own.
First Chart Deployment Tutorial
After installing Helm, follow the steps below to deploy your first Helm chart.
1. Generate a new chart:
helm create my-appThis command sets up a working chart with sample templates and default values.yaml file.
2. Customize the chart:
Open the values.yaml file and update key fields like the container image, replica count, or environment variables to match your app.
3. Install the chart:
helm install my-app ./my-appThis deploys your app to the Kubernetes cluster using the settings defined in values.yaml.
4. Check the deployment status:
helm status my-appCommon Commands and Workflows
Once you start using Helm, you’ll rely on a handful of commands regularly. Here are the most useful ones to know:
# Create a new chart scaffold
helm create my-app# Install a chart into your cluster
helm install my-app ./my-app# Upgrade an existing release
helm upgrade my-app ./my-app# Roll back to a previous version
helm rollback my-app 1# Uninstall a release
helm uninstall my-app# Add a chart repository
helm repo add bitnami https://charts.bitnami.com/bitnami# Update repo metadata
helm repo update
These commands cover the basics of creating, installing, managing, and cleaning up releases. For most workflows, this is more than enough to get started.
Chart Customization and Values
Helm charts are designed to be configurable. Instead of editing template files directly, you pass in values through a values.yaml file or override them at install time.
There are two main ways to do this:
1. Using a values file:
helm install my-app ./my-app -f values-dev.yaml2. Using inline overrides:
helm install my-app ./my-app --set image.tag=1.2.3If both are used, Helm gives priority to the --set flag. This lets you fine-tune a deployment without changing the base chart.
For multi-environment setups, it’s common to create one values file per environment (e.g., values-dev.yaml, values-prod.yaml) and reuse the same chart with different inputs.
Helm Repositories and Chart Ecosystem
Helm uses repositories to distribute and manage charts, similar to how npm or pip work for other ecosystems. Repositories host collections of charts that you can search, download, and install.
One of the most widely used public sources is Artifact Hub, which contains thousands of charts maintained by the community and vendors like Bitnami, Prometheus, and Grafana.
To use a public chart, you first add the repo:
helm repo add bitnami https://charts.bitnami.com/bitnami
helm repo update
Then, search for available charts:
helm search repo nginxYou can install a chart directly from the repo without writing any templates yourself:
helm install my-nginx bitnami/nginxThis makes Helm especially valuable for quickly deploying common applications or infrastructure components with minimal setup.
Advanced Helm Features and Best Practices
Once you’re comfortable using Helm for basic deployments, there are a few advanced features worth exploring, especially for production use.
Helm Hooks and Lifecycle Management
Helm lets you run specific tasks before or after a release using hooks. For example, you can trigger a database migration job before the main app starts:
pre-installpost-installpre-upgrade,post-upgradepre-delete,post-delete
These can be useful for setup steps, cleanups, or running health checks tied to your deployments. For teams looking to monitor these actions more closely, the Kubernetes Event Explorer offers a helpful way to trace Helm hook execution and cluster events in real time.
Subcharts and Dependencies
Helm supports dependencies through subcharts, which are charts nested inside a parent. This is helpful for modular apps (like separating frontend, backend, and database) while keeping everything deployable as one unit.
Use Chart.yaml to declare dependencies, and helm dependency update to pull them in.
CI/CD and GitOps Integration
Helm works well in automated pipelines and GitOps workflows. Since charts are templated and version-controlled, you can integrate Helm with tools like GitHub Actions, GitLab CI, or Argo CD to handle deployments across environments.
Common Helm Use Cases and Examples
Helm is used across a wide range of Kubernetes deployments, from microservices to infrastructure provisioning. Here are a few examples that show where Helm adds the most value.
Microservices Deployment
In a microservices architecture, each service can be packaged as its own chart or a subchart within a larger application. This makes it easier to manage shared configuration and deploy everything together or independently.
***Example: ***An e-commerce app with services for frontend, catalog, payments, and inventory is all deployed using one Helm chart with shared values.
Database and Infrastructure Management
Helm is ideal for deploying off-the-shelf tools like databases, dashboards, and monitoring systems.
Many of these are available as ready-to-use charts on Artifact Hub. Once deployed, you can tie them into observability stacks using tools like Coordinator and Gateway Pipelines, which collect cluster-wide logs and metrics for deeper insights.
Example:
helm repo add bitnami https://charts.bitnami.com/bitnami
helm install postgres bitnami/postgresql
Multi-Environment Deployment
Helm’s values files allow you to use the same chart across dev, staging, and production, with different resource limits, image tags, or settings.
Example:
helm install my-api-dev ./my-api-chart -f values-dev.yaml
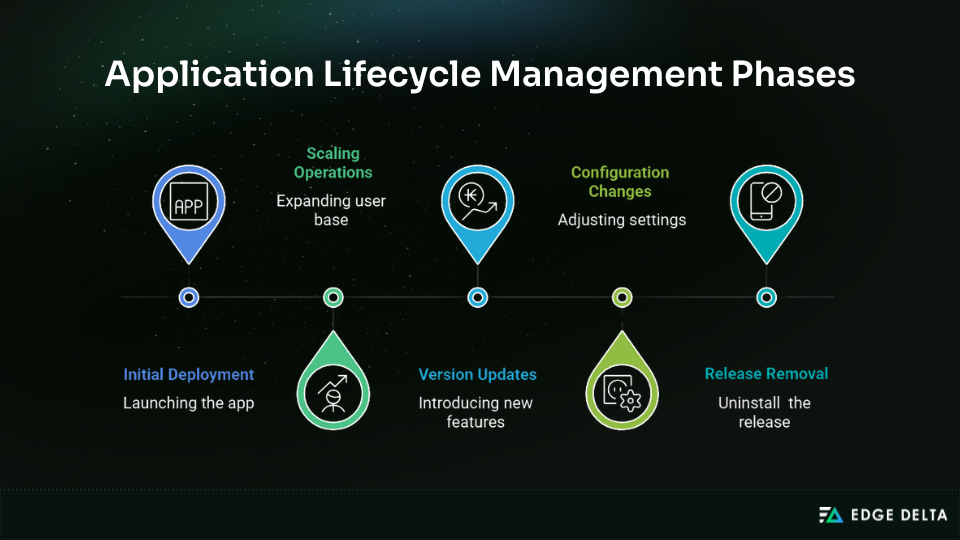
helm install my-api-prod ./my-api-chart -f values-prod.yamlApplication Lifecycle Management
Complete application lifecycle management encompasses initial deployment, scaling operations, and configuration updates with Helm’s release management. This feature enables rollback strategies and deployment validation procedures for operational reliability through a consistent CLI command.
Here are the usual app lifecycle management phases:
Helm Security and Best Practices
Using Helm adds flexibility to your Kubernetes workflows, but it also introduces security considerations, especially when it comes to sensitive data and chart integrity.
Here are a few best practices to keep in mind:
-
Don’t store secrets in values.yaml
Helm charts are not encrypted by default. Use Kubernetes Secrets or the Helm Secrets plugin to manage sensitive values securely.
-
Restrict access with RBAC
Limit who can install or modify charts in your cluster using Kubernetes Role-Based Access Control (RBAC).
-
Scan and lint your charts
Use tools like helm lint to catch template errors early, and scan container images for known vulnerabilities before deploying.
-
Use signed charts and HTTPS repositories
When possible, rely on signed charts and trusted repos to avoid tampering.
A bit of proactive security hygiene can prevent larger issues later, especially as you move Helm into staging or production environments.
Conclusion
Helm brings structure, repeatability, and speed to Kubernetes deployments. By packaging applications into charts, it reduces manual YAML management, supports consistent environments, and makes upgrades and rollbacks safer.
Whether you’re deploying microservices, third-party tools, or internal platforms, Helm helps teams move faster and with more confidence.
To get started, install Helm, explore public charts on Artifact Hub, and try deploying a sample application. From there, you can customize values, create your own charts, and integrate Helm into your CI/CD workflows.
As your projects grow, Helm becomes less of a nice-to-have and more of a necessity.
Helm FAQs
What is Helm, and why do I need it for Kubernetes?
Helm is a package manager for Kubernetes that simplifies and automates complex app deployment and management.
How is Helm different from kubectl?
Helm is more suitable for managing complex application lifecycles, while kubectl is essential for direct Kubernetes resources interaction and management of Kubernetes resources.
What are Helm charts and how do they work?
Helm charts are packages that bundle the configured manifests, allowing for consistent and repeatable deployments.
How do I install and get started with Helm?
With helm create and helm install, you can already create and deploy your first chart.
Can I use Helm with existing kubectl deployments?
Yes, you can. Make sure you understand Helm’s structure before you start migrating the existing deployments.
Sources
- Spectro Cloud
- Kubernetes Documentation
- Helm Docs
- Helm Docs
- circleci Blog
- Medium
- Spectro Cloud
- KodeKloud
- CNCF
- Sysdig
- Kong
- Medium
- Datacamp
- Medium
- IBM
- Educative
- Quali
- Mogenius
- API Park
- Plural
- Simple Talk
- Sling Academy
- Qovery
- Medium
- Portworx
- Medium
- Codefresh
- Artifact Hub
- Artifact Hub
- Push Build Test Deploy
- Medium
- Sysdig
- Helmbay